Wire Bond Pull
Wire bond pull testing is used for two principle reasons.
- Process control in a production environment – To determine if the wire bond setup is achieving the required adhesion for first and second bond.
- Mechanical assessment of the bond pad interface for a product qualification – To determine if the sample die construction and its pad metalization are sound and support wire bond attach to a required strength.
The pull test is a destructive test where the ideal outcome is that that wires should break mid-span and above the minimum specified force. This proves out both the assembly process of applying the wire-bond, the quality of the wire-bond and also the bond pad quality and metal interface with the bond. There are other variables which take effect during the test process such as loop height, visual quality of bond, the wire-bonding method itself and to a lesser degree the operator methodology or hook type used during the pull test.
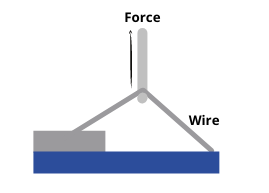
To make a wire-bond pull test a hook is positioned with precision underneath the wire and is pulled in the Z-axis until either the bond breaks (to destruct) or a specified minimum force is achieved with no breakage (non-destruct).

Wire Bond Pull
Wire Bond Pull Standards
At Reltronix we perform wire-bond pull testing to the below industry standards:
MIL-STD-883 Method 2011.9 – Destructive bond pull
MIL-STD833 Method 2023.7 – Nondestructive bond pull

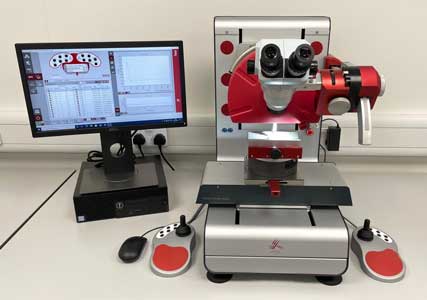
XYZtec Bond Puller
Generically we also perform bond pull testing to customer specifications on:
- Fine wire – Diameter 12.5µm to 75µm
- Large wire – Diameter 100µm to 500m
- Ribbons – Diameter 2000µm x 2500µm
- We also handle fine pitch bonds
We also can perform the below MIL-STD pull and torque tests:
MIL-STD-883 Method 2024.2 – Lid torque for glass-frit sealed packages
MIL-STD-883 Method 2004.7 – Lead integrity
MIL-STD-883 Method 2004.7 – Test condition A: Tension
MIL-STD-883 Method 2004.7 – Test condition A1: Lead braze integrity
MIL-STD-883 Method 2004.7 – Test condition B1: Bending stress
MIL-STD-883 Method 2004.7 – Test condition B2: Lead fatigue
MIL-STD-883 Method 2004.7 – Test condition C2: Stud torque
MIL-STD-883 Method 2031.1 – Flip-chip pull-off test
Specifications can be agreed in collaboration with the customer to support unique requirements for high-reliability applications.
We use state-of-the-art sensor-driven equipment which enables extremely high precision handling, highly accurate digital analysis with simple electronic output data.
Z Axis sensory specification
- Pull force range – 10gf to 10kgf
- Accuracy – ±0.2%
- Resolution – 16 bit
- Sampling rate – 2kHz
Stage specification
Resolution of built in optical linear encoders – 30nm
- X travel – 168mm
- Y travel – 168mm
- Z travel – 168mm
- Axis (X,Y & Z) speed 5mm/s
- Tool rotation accuracy ± 1°C
In addition the wire-bond pull testing, other pull strength tests detailed below can be performed:
- Cold bump pull (CBP)
- Copper pillar pull
- Stud (die) pull
- Tweezer pull
- SMD component pull
- Vector pull
- Lid pull
- SMD gull wing pull
- Ribbon peel
- Film peel
- Adhesive peel
Additionally we use the same base platform in a different configuration to perform a variety of push tests (which also includes die shear testing).
Sales & Support
Environmental Testing
We offer a selection of in-house environmental tests, such as centrifuge acceleration, life burn-in, stabilization bake and thermal shock temperature cycling.
Electrical Test
Semiconductor testing to Mil-PRF-38534 Class H & Class K.
